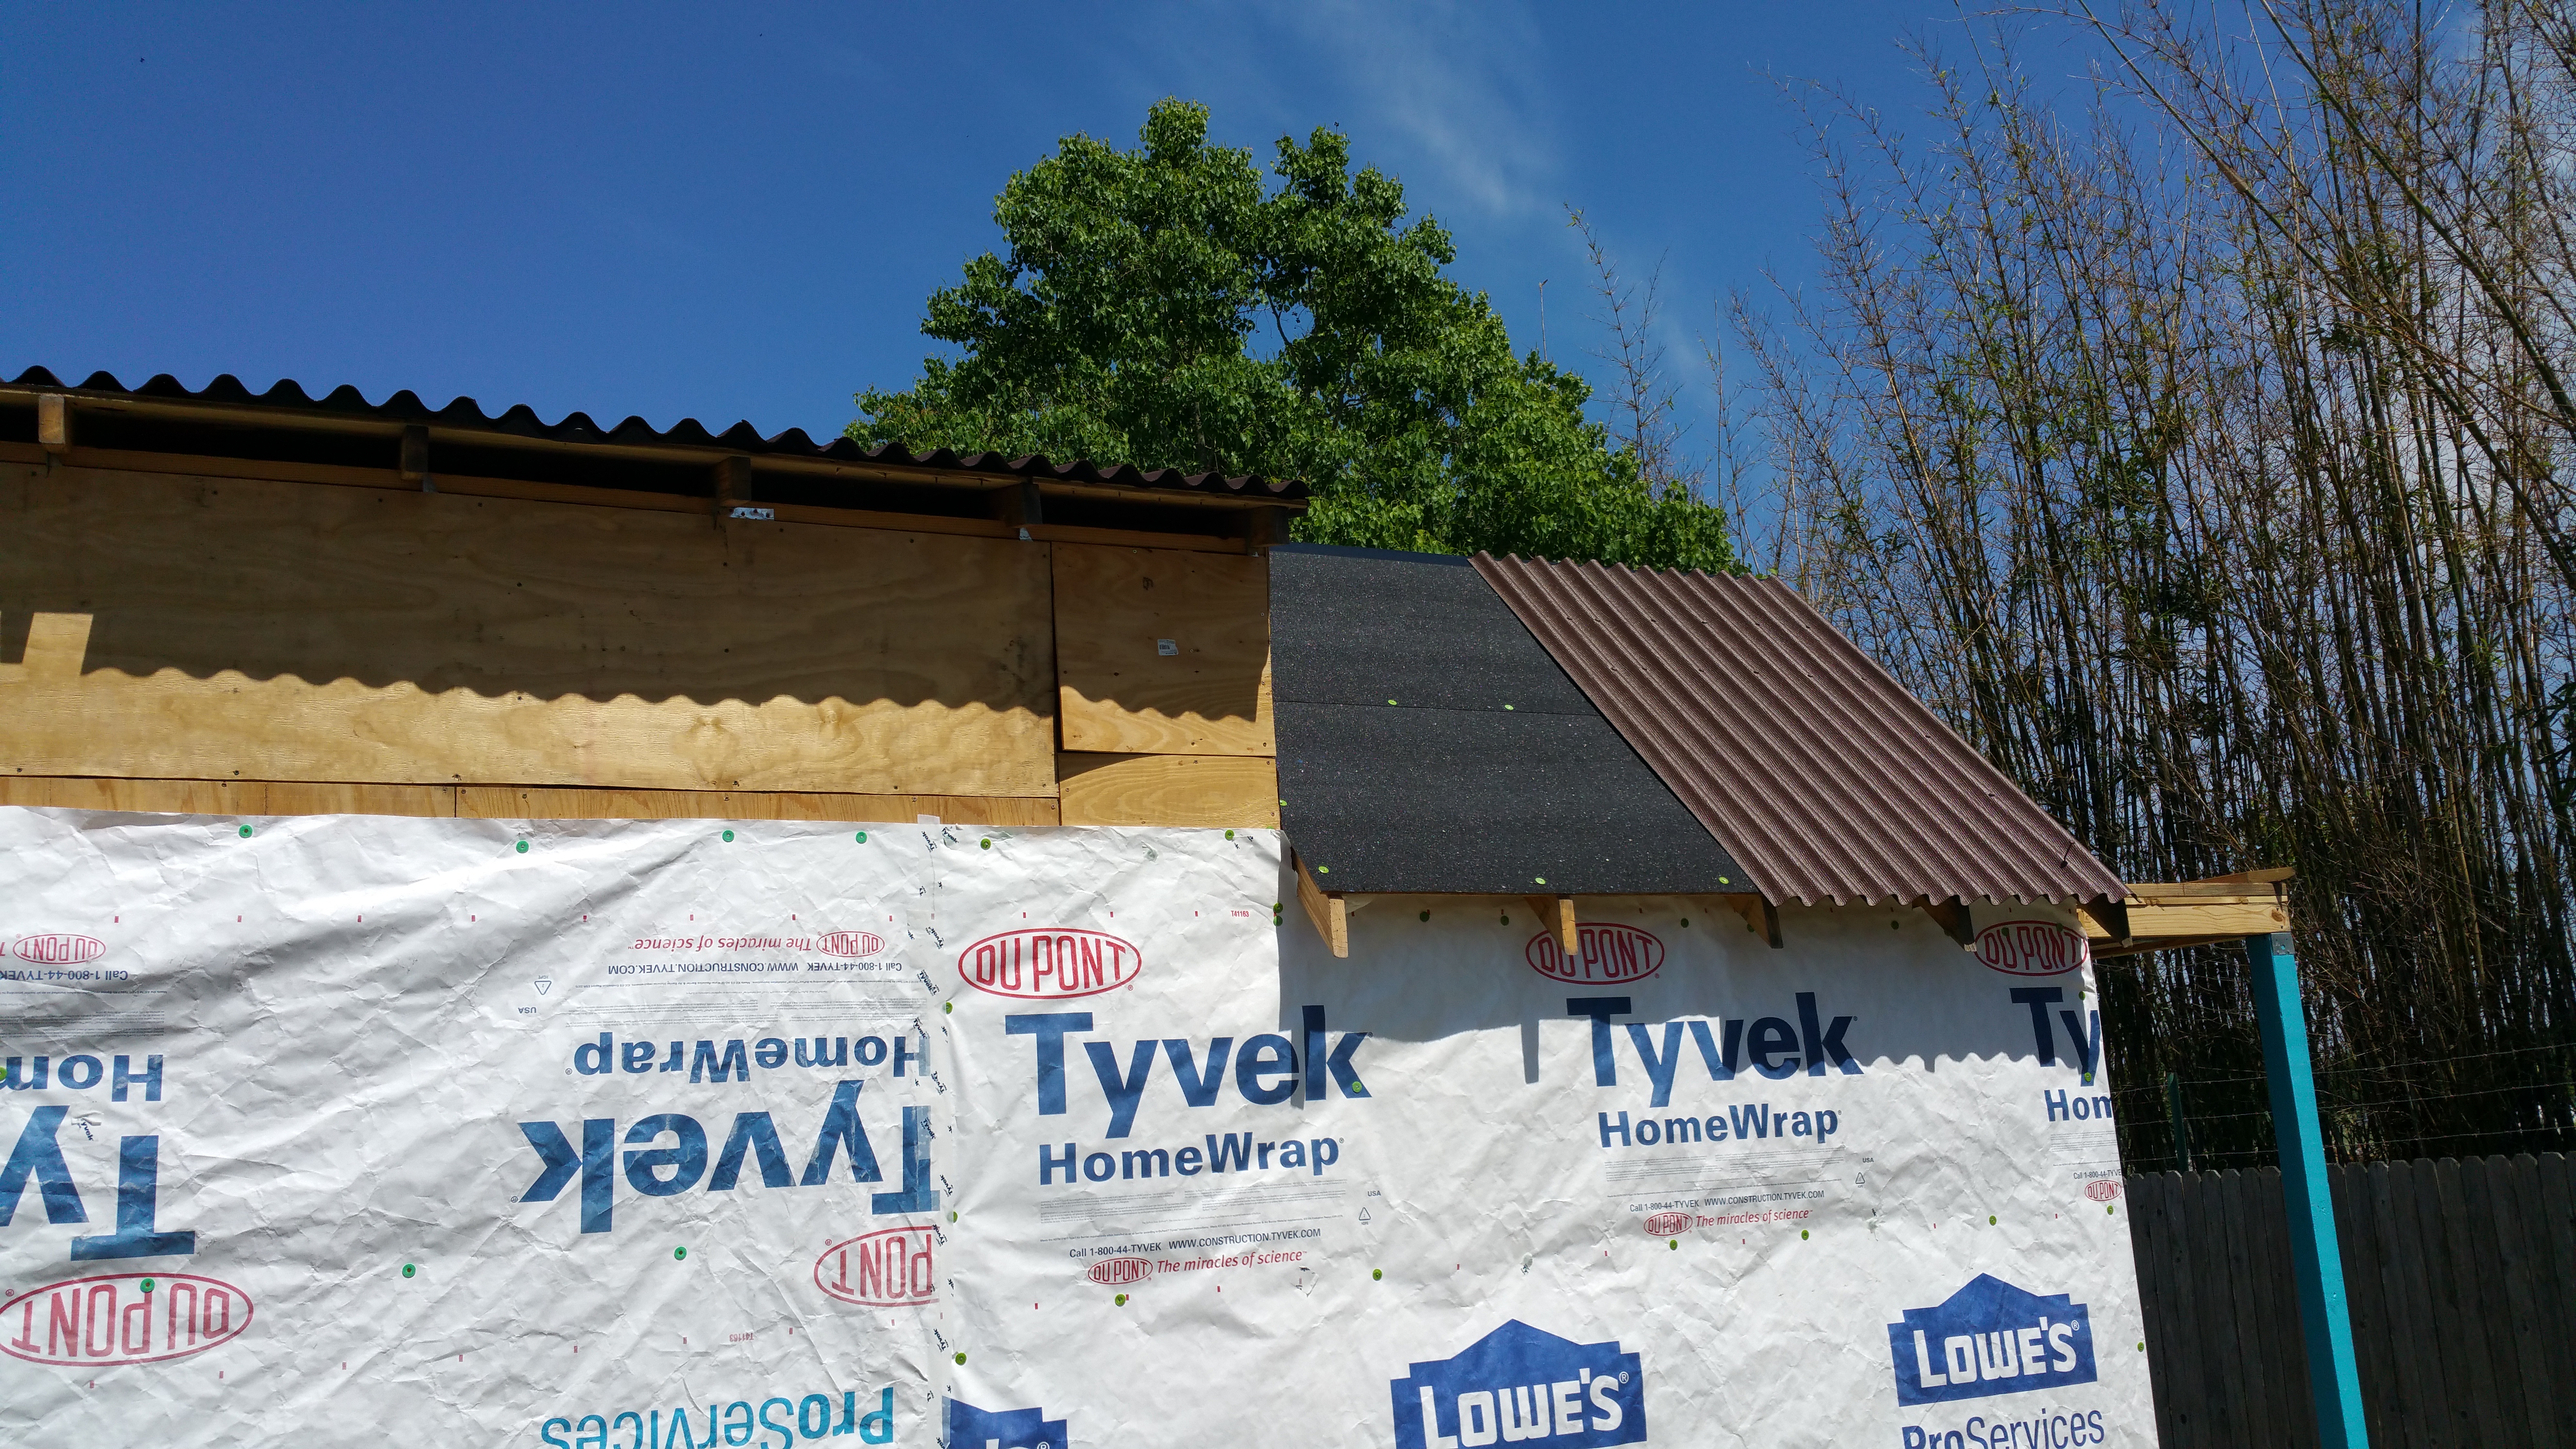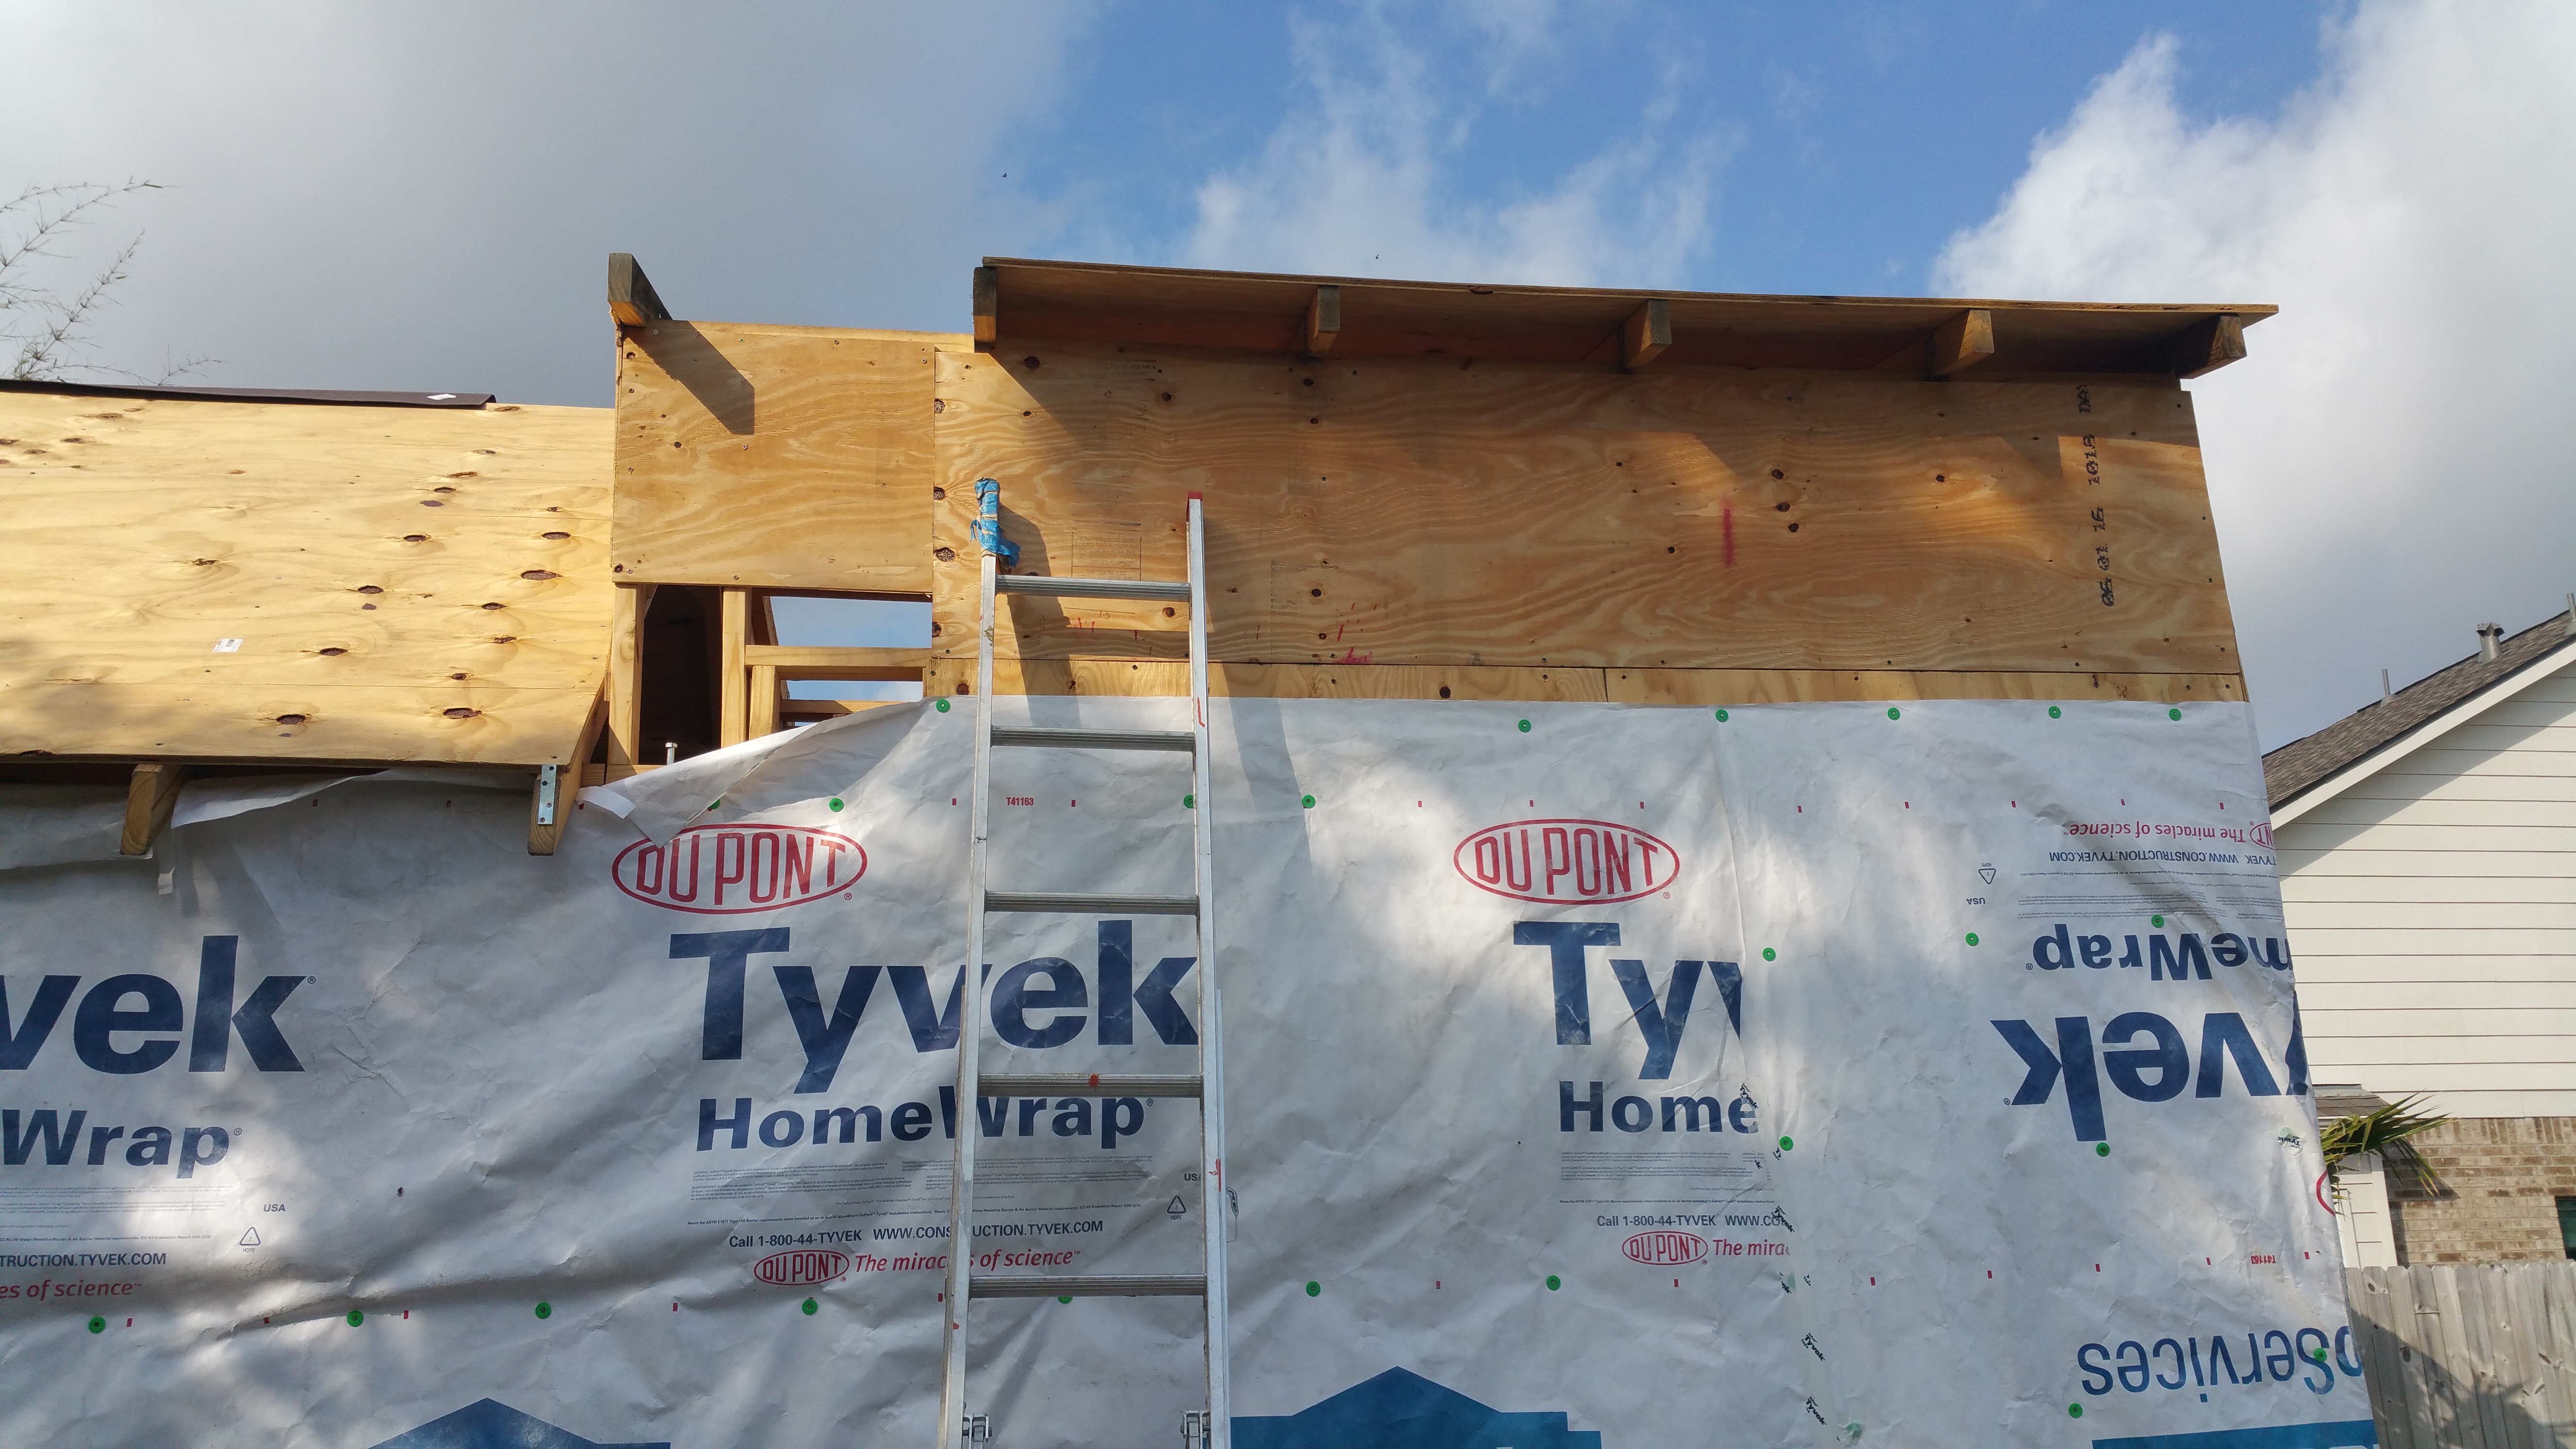
That Comcast wire did a real number on the Ondura roof cap and part of the panel(s).
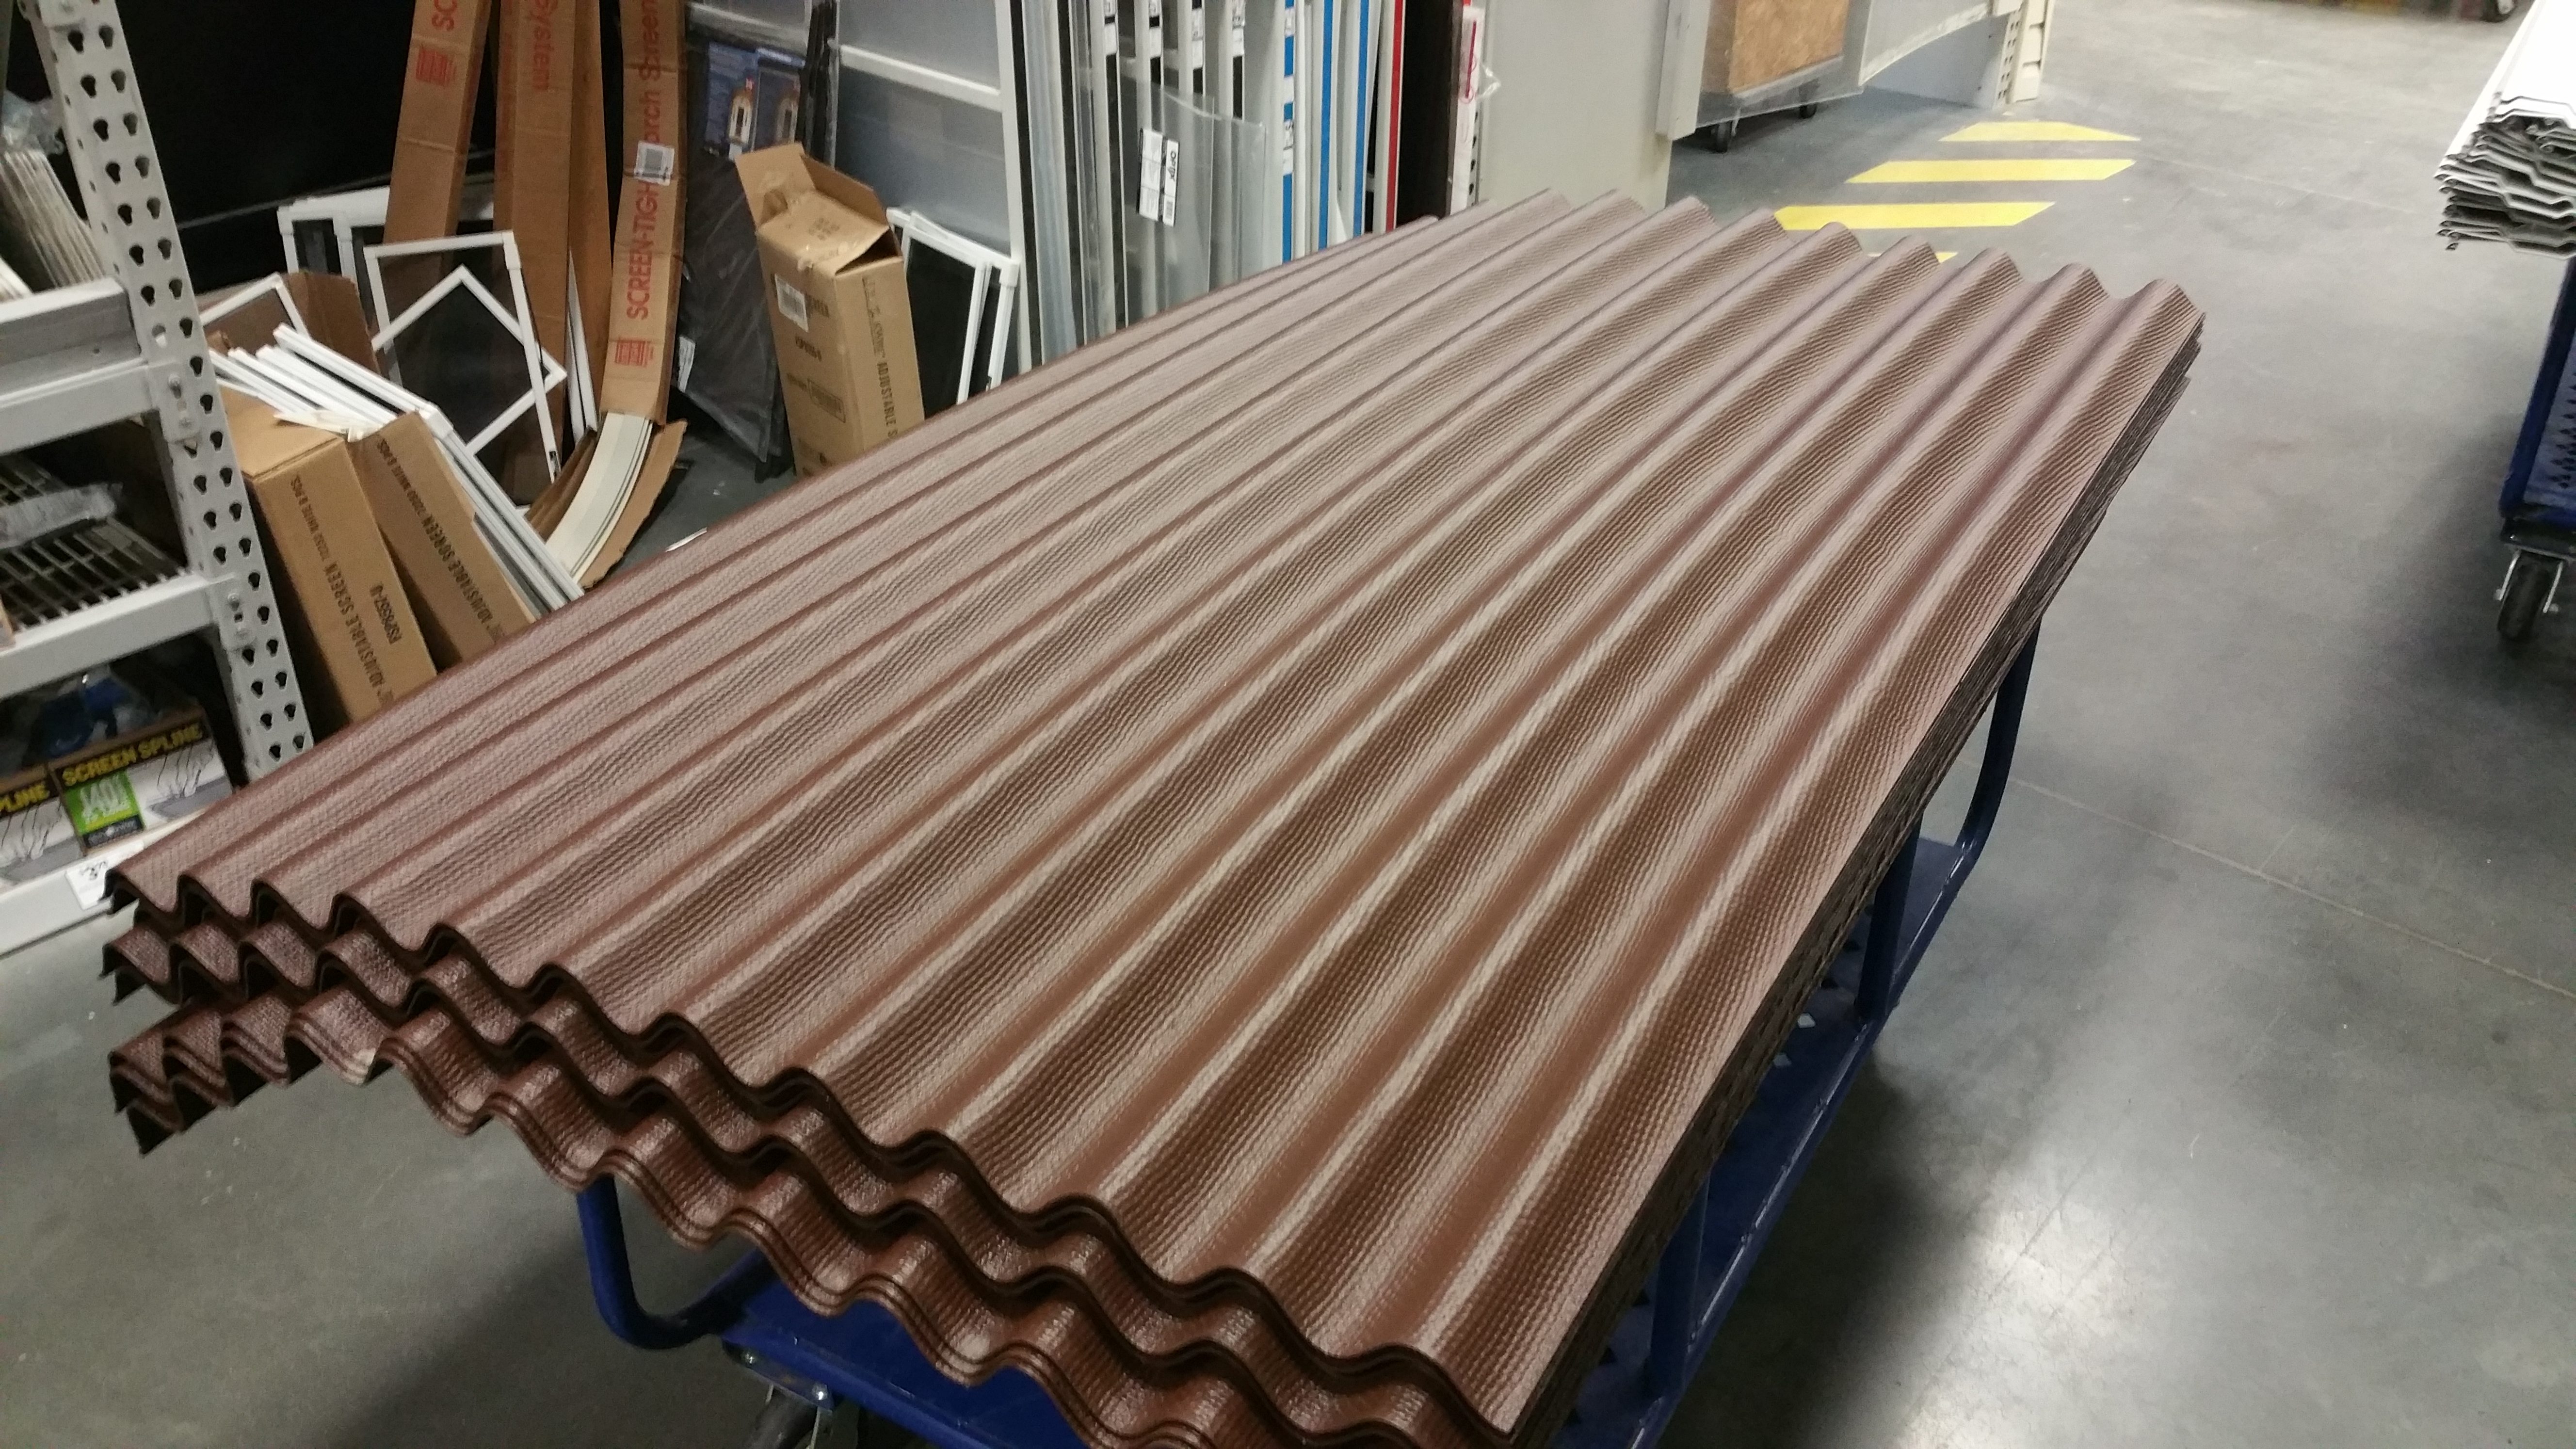
Another stroke of bad luck is Ondura seems to have mostly discontinued (massively scaled back?) their roofing panels. I can get them shipped for pickup at the local Lowes (not available at Home Depot), but the minimum order for the full panels is a 5-pack; I only need about 2-3 of them.
Looks like I’ll have to order a 5-pack of the 1/2-size panels and make do. Ugh.
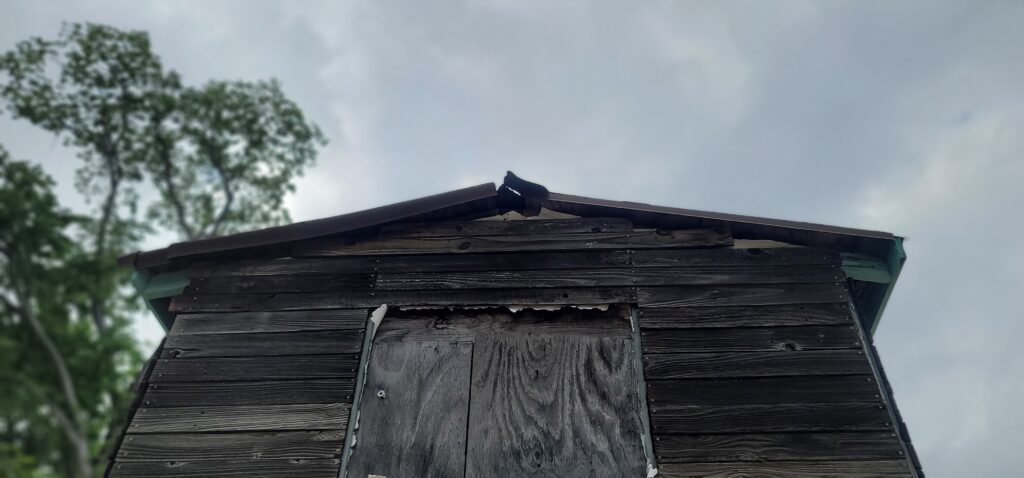
At least I can order the ridge cap in singles. If I cut away the damaged part and cut an overlapping repair piece, I can get away with buying only one or two of them.
It will be a good time to inspect and fix any problems with the underlayment and drip edges.